
There are some photographs that never quite capture the way I experienced a place.
I can remember standing somewhere in dramatic light, looking at a scene full of colour and contrast. The sky was glowing, the shadows still contained detail, and the whole thing had a sense of depth. Then I would return home, open the photograph on my computer and start editing.
Firing up Lightroom, I would adjust the tones, experiment with colour and try to find a balance that best represented the scene I’d just witnessed.
Sometimes I could get close. But often the photograph came up short.
The sky might have lost some of the vividness I remembered. The foreground could look flat, or the darker parts of the image would become noisy as I tried to recover detail. I could spend hours adjusting the same photograph, but eventually I would reach the same conclusion: the file simply didn’t seem capable of reproducing what I had seen.
When I was learning photography, this was something I encountered regularly. I didn’t understand at first why some photographs were so difficult to process. I had taken what looked like a perfectly good view, so why couldn’t I make the shot look the way I remembered?
Eventually I learned about exposure bracketing.
The idea was simple enough. Rather than taking one photograph at a single exposure, I would take several, each at a different level of brightness. The darker exposure would preserve detail in the brightest parts of the scene, while the brighter exposures would record information in the shadows. Back at the computer, I could combine them in Lightroom into a single HDR image containing a much greater range of brightness information.
The first time I did this successfully, it felt a little like I’d discovered a secret. All of these extra bits of data meant a single image could retain detail from the darkest corners of undergrowth to the most delicate textures of the lightest clouds in a sun-filled sky. As I edited these new ‘super images’, I no longer needed to worry about washed-out patches of white or the loss of subtle colours in the darker areas of the foreground.
After a while I started bracketing scenes with even more extreme contrast. Sometimes it would be 5 shots, sometimes 7 or more. I’d capture the most dazzling sunsets on beaches where the foreground was almost black and successfully combine them into huge HDR files.
But that’s when I started to run into a limitation: no matter how much information I captured, the finished photograph was ultimately going to be displayed within the limits of standard dynamic range. Compressing a huge range of brightness into the much narrower range a conventional screen could reproduce was a challenge, and I would often end up with images that didn’t look realistic.
Conventional displays simply can’t reproduce the full range of brightness we can perceive in a scene.
Standing on a city street at night, we can perceive detail in relatively dark side streets while also seeing intense brightness from street lights reflected in windows and puddles. A photograph displayed on a conventional screen has a much smaller range in which to represent those differences.
That has been part of the craft of landscape photography for as long as I have been doing it. You capture a scene with a huge range of brightness, then find a way to interpret it within the limitations of the medium.
It becomes almost invisible after a while. You stop thinking about it.
You photograph the scene, process the HDR file, bring the highlights under control, lift the shadows where necessary and create the best interpretation you can. The photograph may contain considerably more information than you can actually display, but that’s simply how things work. It becomes part of the challenge, part of the fun. Accepting those limitations is simply part of being a landscape photographer.
Until recently, anyway.

• • •
Over the last few years, improvements in display technology have made it possible for modern screens to reproduce a much greater range of brightness. At the same time, developments in image formats have made it increasingly possible to preserve and deliver some of that additional information.
HDR, or high dynamic range, is therefore no longer just something that happens during the capture and editing process. It can now be part of the entire journey from camera to viewer.
That changes things for a landscape photographer.
The ability to capture a greater range of brightness has existed for some time. What is different now is that there are increasingly common ways of actually showing that range to someone looking at the photograph.
I’ve been watching these developments from a distance for several years. I didn’t have an HDR-capable display on my computer, and delivering HDR photographs through a website introduces another layer of complexity. There seemed to be quite a few reasons to leave it alone.
Smartphones have begun to changed that. Modern phones can have remarkably capable HDR displays, and I already had an iPhone in my pocket. Recently I decided that it was time to stop watching from a distance and see what I could actually do with my own photographs and this new display technology.
The first photograph I processed specifically for HDR delivery was Moraine Lake in Canada. It wasn’t an obvious candidate. It was a cloudy daytime photograph rather than one of those spectacular scenes with a bright sunset and deep shadows. I just wanted to see what was possible.
As I pushed the highlights higher, the snow-covered slopes became brighter, and the clouds above the peaks became more textured and dramatic. At first, I was excited by how much more room I had to work with. But I quickly pushed it too far. The clouds became unnaturally bright and almost metallic.
I went back and processed it again, this time using the additional range much more subtly. The result was less dramatic, but more convincing. The scene started to feel more faithful.

Another image I’ve enjoyed revisiting is a photograph I took in Calgary.
Flock and Flame looks across downtown Calgary as a dramatic sunset developed above the city, with the colours reflected across the Bow River. It was probably the most spectacular combination of light and colour I encountered during my trip to Canada, but I never felt that my edits did it justice. The contrast didn’t feel quite right, and whenever I tried to push the image further, it started to look artificial.
Processing and outputting that image as HDR has allowed me to achieve a result closer to the experience of standing on that bridge at sunset. It doesn’t fully capture the vibrance and range of contrast of the moment, but it gets significantly closer, and I find that exciting.
The difference isn’t simply that the photograph is brighter. It’s that there is more room to represent the relationship between the bright sky, the darker city and the reflections in the river.

I’ve noticed something similar with photographs of cities at night. The lights themselves are often part of the subject.
On a conventional display, I had always treated those bright lights as something that needed to be brought under control. On an HDR display, I can allow them to occupy a little more of the range available to the photograph. The lights are part of the story of many of my cityscape photographs, and it’s great to be able to share that with greater fidelity.
• • •
There are, however, a few problems with all of this.
I don’t currently have an HDR-capable display on my computer, which makes editing HDR photographs rather more complicated than it would otherwise be. I have been using an iPhone as a way of previewing the results, switching between my computer and the phone to see how the photograph changes.
It isn’t an ideal workflow, but it has been enough to start experimenting.
Getting the photographs onto my website has been another challenge. Producing an HDR image in Lightroom is only one part of the process. The file then needs to make its way through the website and eventually into a browser, and the visitor needs a compatible display to benefit from the additional range.
There are also technical quirks in how different browsers and displays handle these images. I’ve occasionally seen banding in skies where a photograph should have a smooth tonal transition. This was particularly noticeable in my photograph of Downtown Vancouver. Although the HDR processing significantly enhanced the image, the banding in the sky was distracting enough that I’ve removed the HDR version from the website for now. I’ve also experienced some images unexpectedly falling back to their SDR versions during certain transitions, and occasionally they don’t display at all. These problems occur inconsistently, making them difficult to pinpoint and reliably resolve.
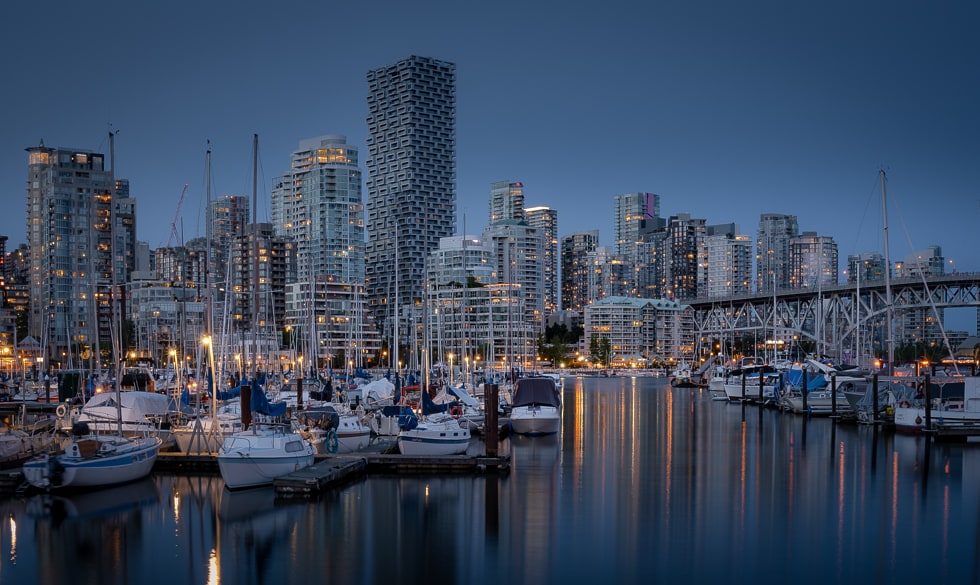
It has been a useful reminder that creating an HDR photograph and delivering one successfully are two different things. The photograph can contain all the information I want, but if something along the way handles it incorrectly or simply doesn’t display it as intended, the viewer may never see the result I created.
That has been the frustrating part of this experiment.
The technology itself is exciting. I like the additional range available to me, and I’ve enjoyed revisiting photographs that I never felt I had quite managed to reproduce in the way I remembered them. There is clearly a lot of potential here, both for photography and for the way photographs can be presented on the web.
But for me, the benefits need to outweigh the uncertainty. If I am going to spend more time processing, exporting and testing photographs for HDR, I need to be reasonably confident that the result my viewer sees will be the result I intended.
At the moment, I don’t think I can be confident of that.
So for now, I’m going to keep experimenting, but I’m not going to make HDR the default way I present my photography. I’ve added an HDR section to the website where I can continue to explore the possibilities, while the rest of the site will remain deliberately consistent.
Perhaps that is where HDR belongs for me at the moment: not something to abandon, but something to keep watching.
The technology is exciting. I just think it needs a little more time.
